PIAA Lights Installation
Well I finally got around to installing some auxillary lights. I wanted something fairly easy (I'm no electrician!) and I didn't want to overwhelm the alternator. I settled on PIAA 004X lights with 35W bulbs each. I got them from Cycle Gadgets packaged with their Terra Nova light bar. The light bar mounts to a bracket under the fender.

The light bar installation took about 1/2 hour. The bar and mounting bracket are aluminum and seem well built. Note to self, and anyone who installs this light bar: it comes w/out holes drilled to mount the lights - so you can pick actual location. Even though its aluminum, make sure you use a counter punch to start your drill point - I did but didn't make a deep enough "divot" and one hole wandered off center by about 1/8 inch.
The package came with a full wiring harness. I thought this would make life easier - not so much. The leads for each light and the switch were about 6 ft long, and the leads for the battery terminal were only about 1 ft long. I couldn't find a nice place to put the relay in the battery compartment, so I added length to the battery leads (red wires below)

and mounted the relay behind the frame for the headlight:
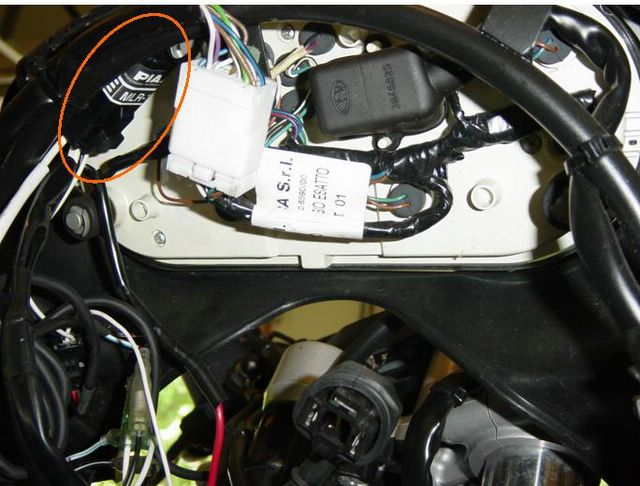
I routed the wires from both lights to the right side of the bike and then up along the main wiring harness.
Green is the route from the left side and red is from the right side light.

This picture also shows the pre-soldered, shrink tube waterproof connectors I used - got them from NAPA Autoparts.
This shot shows the extensions for the battery terminals (red wires)

For the left light, I routed the wires along the brake line and then through the frame:

Here's a close-up of where I went through the frame from Left to Right side of bike:

I took and idea from Bill Mallin of the Chain Gang and mounted the switch to the knockout plug on the throttle assembly. I simply sanded the surface of the plug flat and then attached with the adhesive tape.

I tapped into the powered lead to the tail light to provide power to the switch. With this setup, I can turn the lights on/off whenever I want so I can use them with high or low beams, or simply have them off.
Hope this info is useful to anyone doing this job. It wasn't difficult, just take your time and think about where the wires need to be routed - remember enough slack for full-lock in both directions. Also tie-wraps are your best friend.
The light bar installation took about 1/2 hour. The bar and mounting bracket are aluminum and seem well built. Note to self, and anyone who installs this light bar: it comes w/out holes drilled to mount the lights - so you can pick actual location. Even though its aluminum, make sure you use a counter punch to start your drill point - I did but didn't make a deep enough "divot" and one hole wandered off center by about 1/8 inch.
The package came with a full wiring harness. I thought this would make life easier - not so much. The leads for each light and the switch were about 6 ft long, and the leads for the battery terminal were only about 1 ft long. I couldn't find a nice place to put the relay in the battery compartment, so I added length to the battery leads (red wires below)
and mounted the relay behind the frame for the headlight:
I routed the wires from both lights to the right side of the bike and then up along the main wiring harness.
Green is the route from the left side and red is from the right side light.
This picture also shows the pre-soldered, shrink tube waterproof connectors I used - got them from NAPA Autoparts.
This shot shows the extensions for the battery terminals (red wires)
For the left light, I routed the wires along the brake line and then through the frame:
Here's a close-up of where I went through the frame from Left to Right side of bike:
I took and idea from Bill Mallin of the Chain Gang and mounted the switch to the knockout plug on the throttle assembly. I simply sanded the surface of the plug flat and then attached with the adhesive tape.
I tapped into the powered lead to the tail light to provide power to the switch. With this setup, I can turn the lights on/off whenever I want so I can use them with high or low beams, or simply have them off.
Hope this info is useful to anyone doing this job. It wasn't difficult, just take your time and think about where the wires need to be routed - remember enough slack for full-lock in both directions. Also tie-wraps are your best friend.
posted by dbtgeology at 6:16 PM
![]()


1 Comments:
How cool is that that you give me credit for the location of your switch!
Post a Comment
<< Home